Managing complex data relationships in PMG Records
Join us for a discussion on joins

We promised to tell you more about Records, and so here we go with Part 2. First off, we apologize for burying the lead in Part 1. PMG Records uses MongoDB. Mongo DB is an application data platform that offers a unified query interface while supporting a more flexible data model.
OK, back to PMG Records. In our Records Part 1 newsletter, we showed you how easy it is to manage data within the platform. You can create/update/delete datasets via an intuitive administrative interface without writing SQL queries.
All of that is great! But what if you need to manage complex data relationships? This could be the point where the thought of writing SQL queries makes your heart race and your skin itch. Those “join” clauses can be pretty tricky.
Well, we’re here to tell you that building those relationships is much easier using our Records feature.
With relational databases like SQL, you need to leverage those data relationships to pull back the data you need for a given report or display. Unfortunately, creating relationships between multiple tables and understanding the nuances of different SQL joins clauses make your head spin.
But now, PMG Records allows you to create these types of relational datasets without code. The user interface provides a pop-up guide to walk you through what you need to do.
Let’s look at a simple example. In Records Part 1, we showed you how to set up a dataset of records for cars. This time, we’ll create another Record Collection – one that contains people and the cars that they each own. (Refer to our previous newsletter for a refresher on how to do this.)
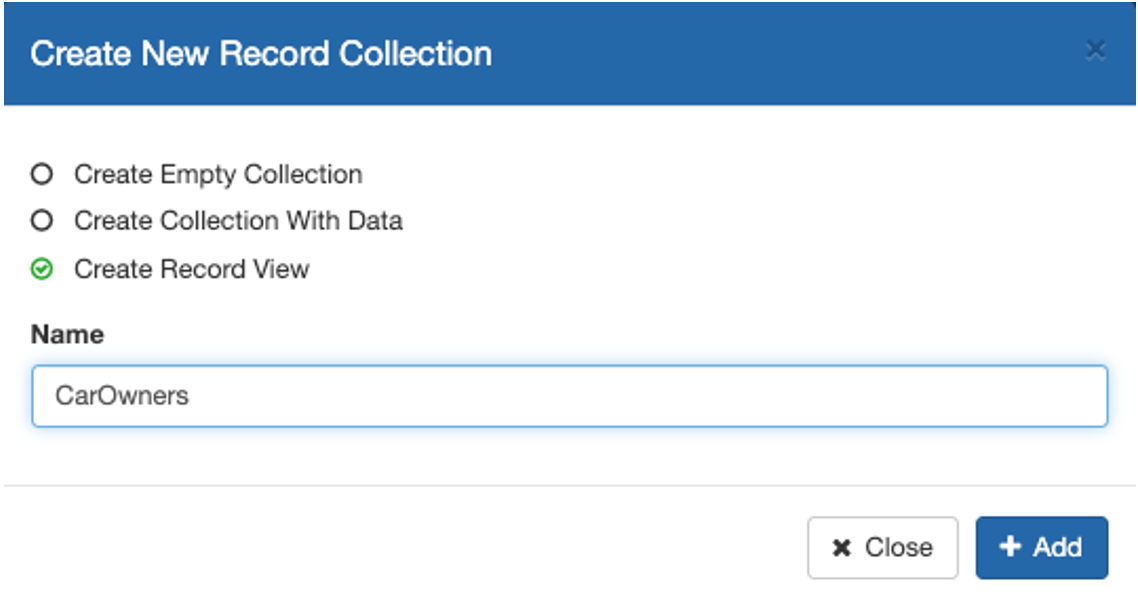
Next, we need to create a Record View. Go to Records using the “Ctrl /” shortcut or by navigating to Administration > Records. Select Create Record View, give it a name (“CarOwners” in this case), and click Add.
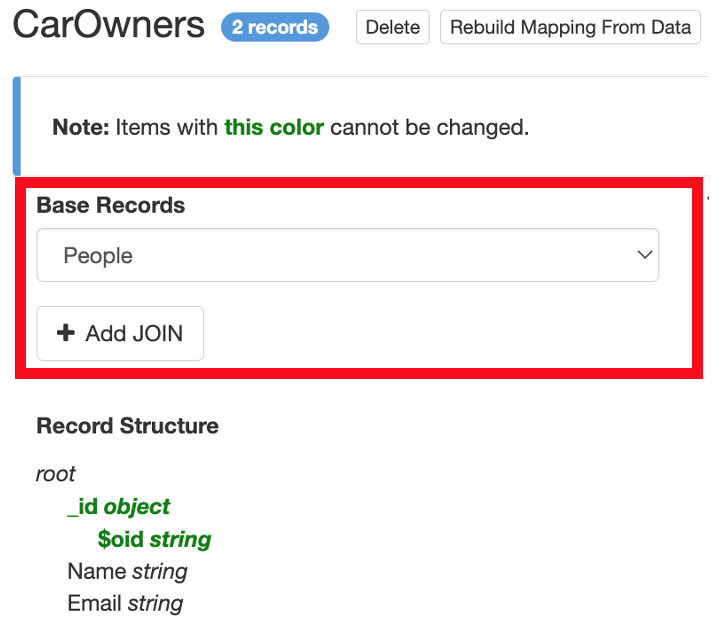
Once the Record View has been created, we need to define the Base Records. In this case, we’ll choose our “People” collection – the one that we created a couple of steps back. Because we need to pull data from both of our collections, “Cars” and “People”, we’ll click on the Add JOIN button to link these two collections.
A pop-up window called Join Options will open to guide me through selecting the values needed to link the two collections. Essentially, it’s asking you to provide the field common to both collections, which in this case in an Email field.
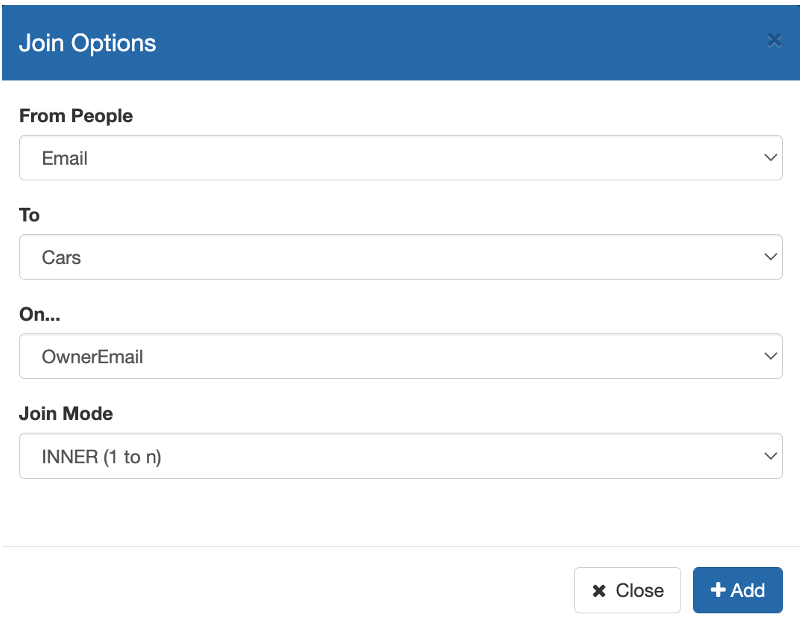
You see that it also asks for Join Mode. If you’re not familiar with these SQL terms, we know it can be a bit challenging. In this case, by choosing INNER we’re saying that for each person that I have a record for, find all the cars who have a matching email record – “1 to n”. This will also exclude any People or Car records that don’t have a corresponding match.
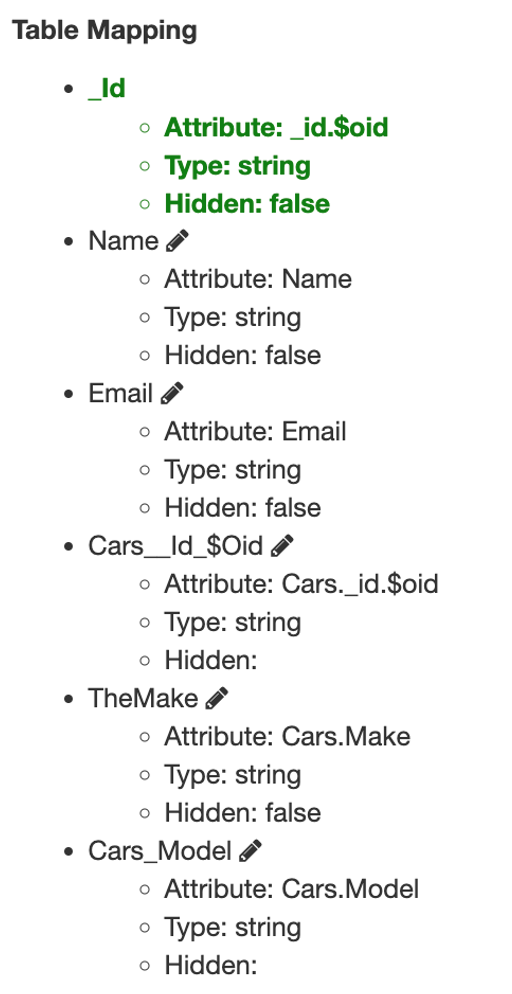
So, at this point we have a fully working “CarOwners” Record View. From here, you can polish it up by reviewing and updating the Table Mapping. You can hide unwanted columns or rename them – just click the pencil icon by any field.
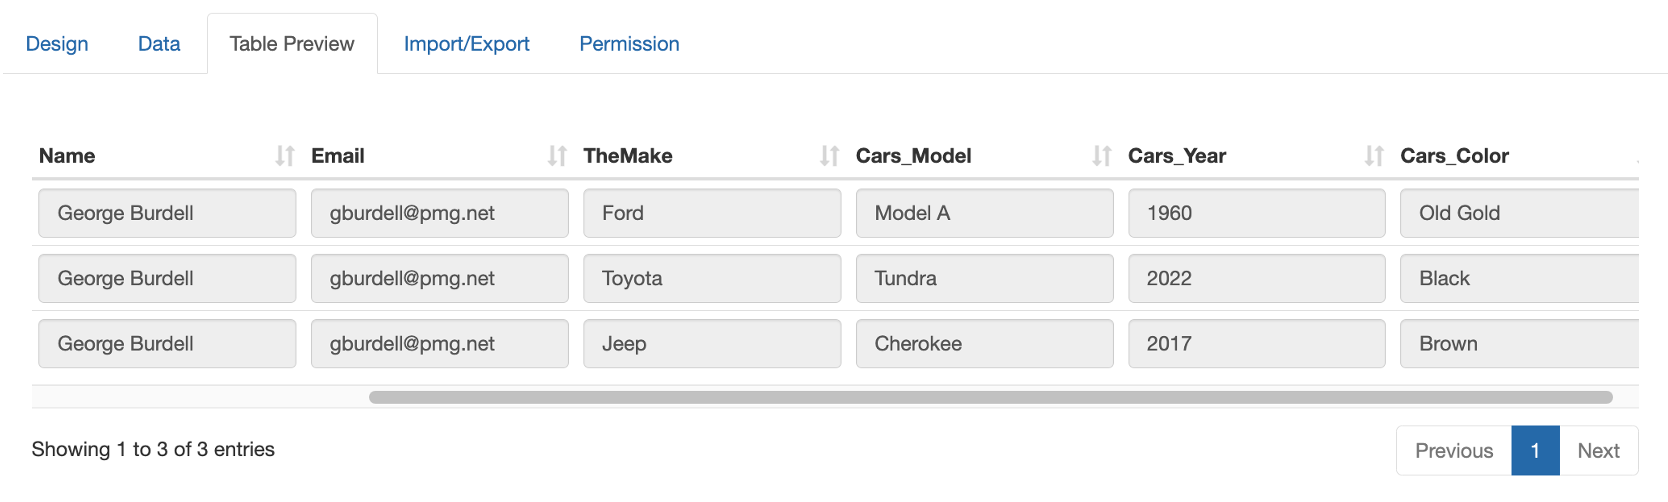
And, voila! Toggle over to the Table Preview tab, and here’s our result. “CarOwners” is now ready to be used anywhere in the Platform in any PMG object – app page, form, or workflow.
That’s the end of Records Part 2, but we’re definitely not done covering Records. Keep an eye out for the next Records newsletter, coming soon.
