Package Manager & Remote Package Manager
Step-by-step instructions for easy migrations
We told you we’d be back with more detail on how to use Package Manager and Remote Package Manager. Now here’s the guide you need to take full advantage of these enhancements.
Package Manager lets you assemble the components of your solution as a package – forms, workflows, SLA’s, queues, and more. Add Tags and Descriptions to facilitate team collaboration and version control. Export a zip file of your package, and then import it into the destination environment.
To make the process even simpler, use Remote Package Manager when possible to migrate solutions in one step.
We’ve got all the information you need at your fingertips to make your life much easier when it comes to migrations!
Package Manager
It’s time to move. Your team has just finished developing a new process and has been given the ok to move the solution into your testing environment. Or perhaps testing has been completed, and you’ve been given the go-ahead to move your work into production. Either way, it’s time to migrate your work from one environment into another.
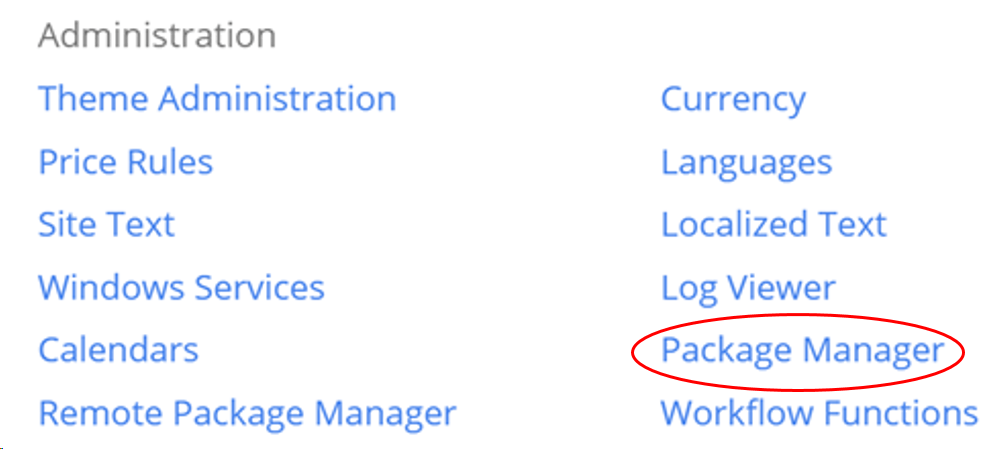
The Package Manager is an administration function that allows a system administrator to create a collection of artifacts – such as forms, shared forms, workflows, email templates, SLA’s, queues, apps, and calendars – so that they can easily be migrated from one environment into another.
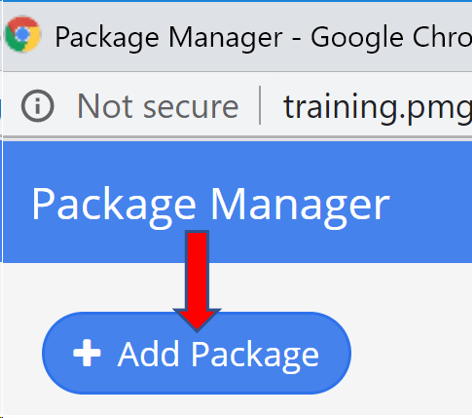
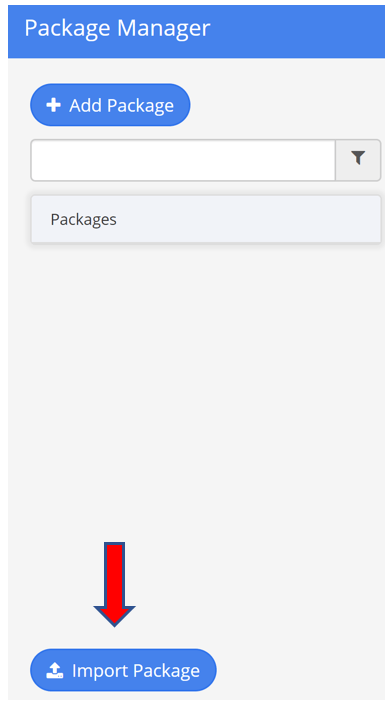
Let’s first talk about creating a package. In order to create a package, open Package Manager and click on the Add Package button.
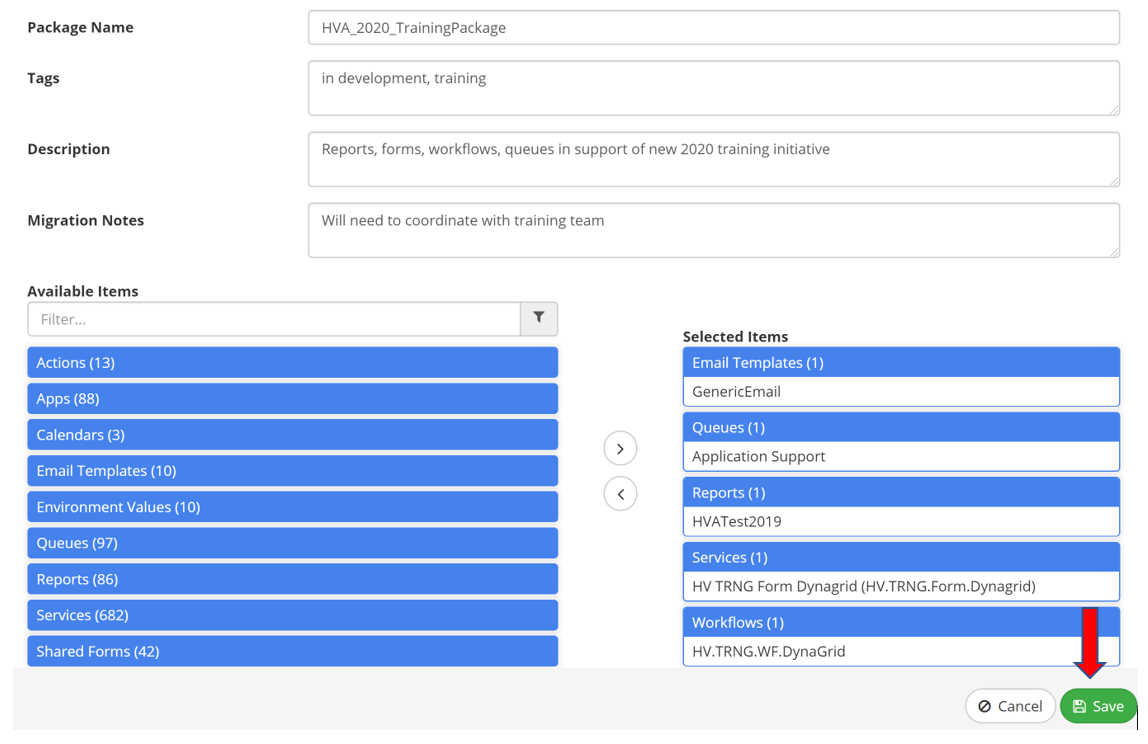
The Package Builder screen will appear and will prompt you to enter in some basic information. The Package Name is something that should be unique, relevant to the collection of items, and easily identifiable.
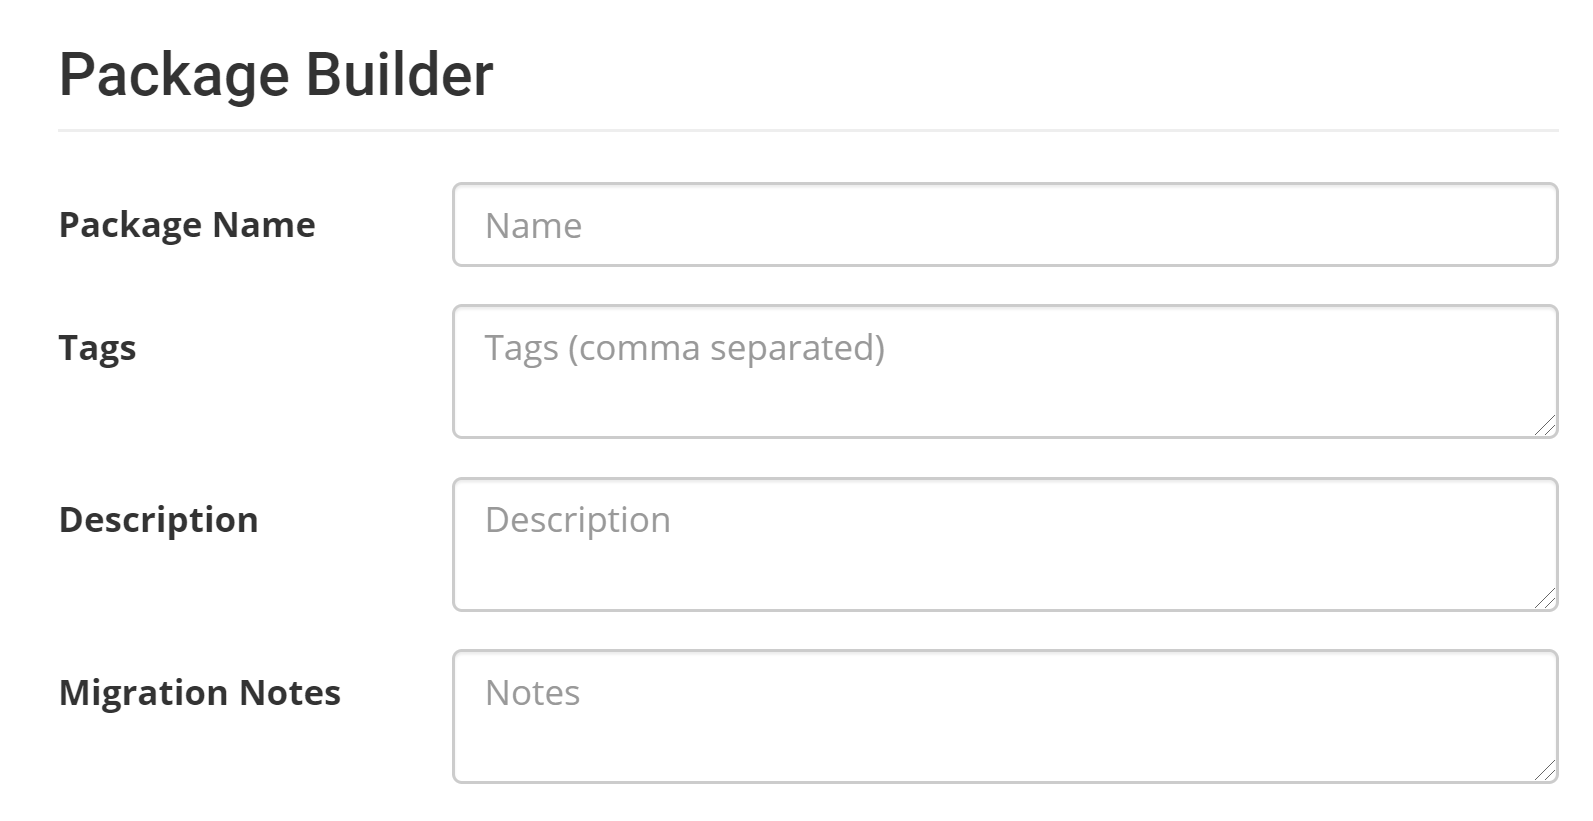
You can also add tags to the package to allow them to come up in keyword searches. They can be used to specify the collection of items themselves or can even be used to tag the status of the collection, for example, “ready for release” or “in development”.
The Description field allows a user to write more detailed information about the package.
The Migration Notes field allows a user to add in other items that may need to be remembered as part of the migration but are not included in the package itself, such as if any sql scripts need to be run or if any system setting changes need to be made. Also, if there is coordination required with another team/system, you may want to note the information here.
Next, you will want to select the items to include in your package. By default, you will see all available items grouped by type.
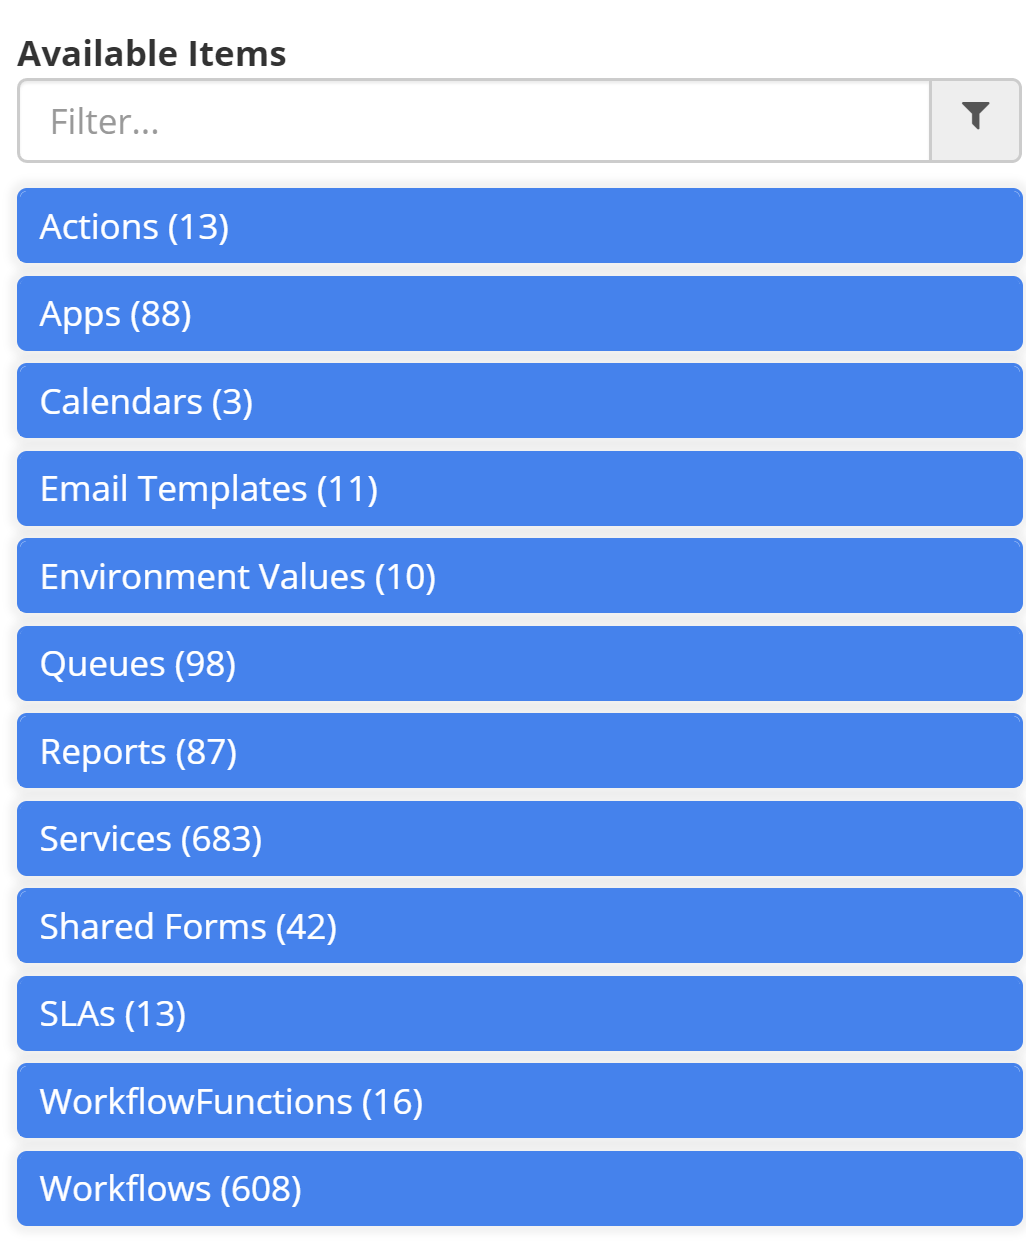
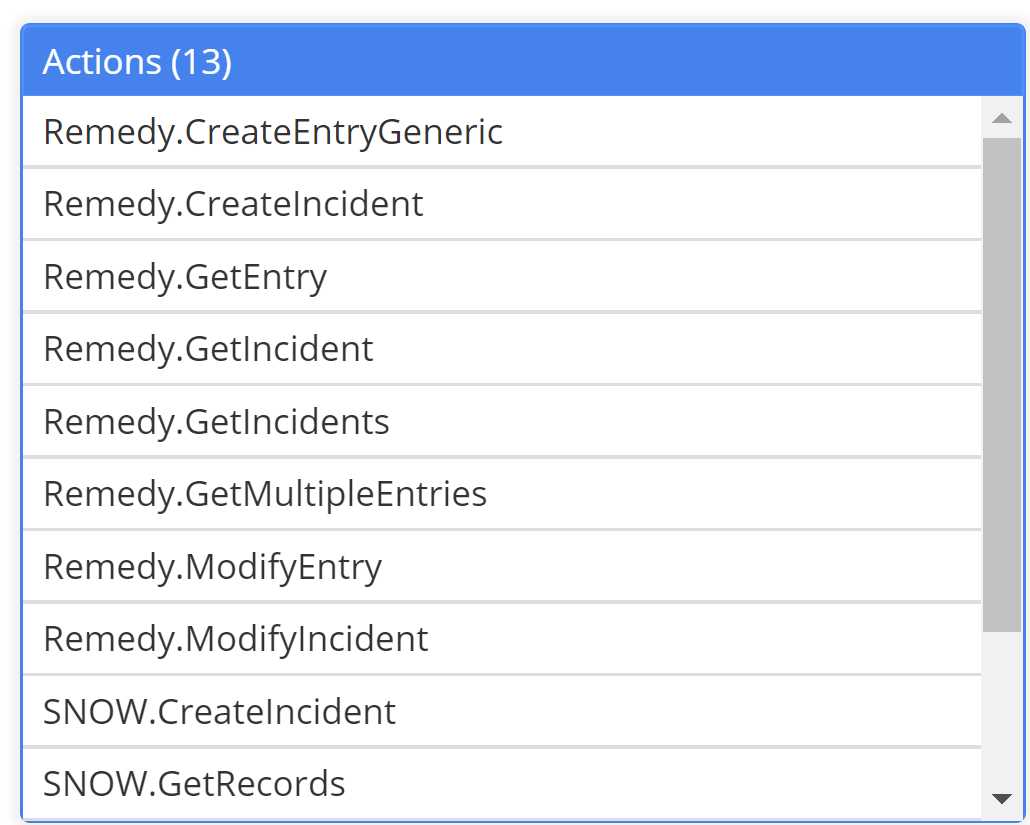
By clicking on a category type, you can expand and see the specific items listed in that category that are available to be included in the package.
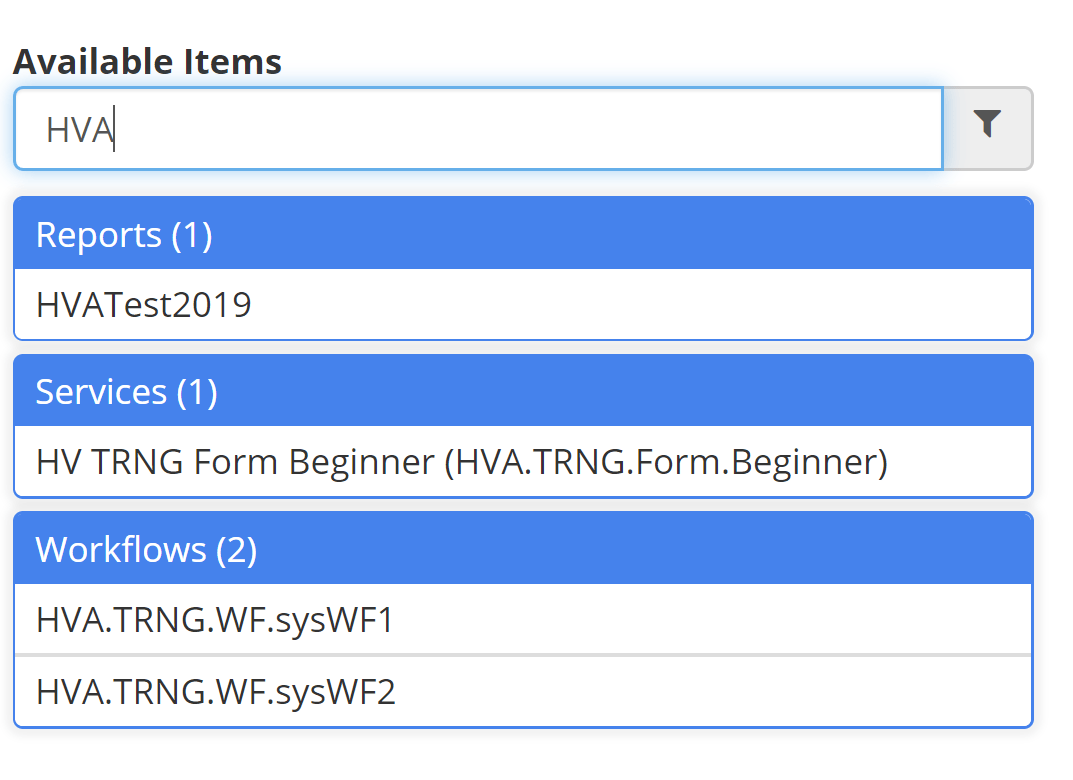
Or you can use the filter option to find the items you want to include in your package. The filter will work across all categories.
In order to move an item from the available item list to the selected item list, first click on the item you want to move. It will become bold when you do this. Then click on the button pointing to the right to move the item to the selected items box.
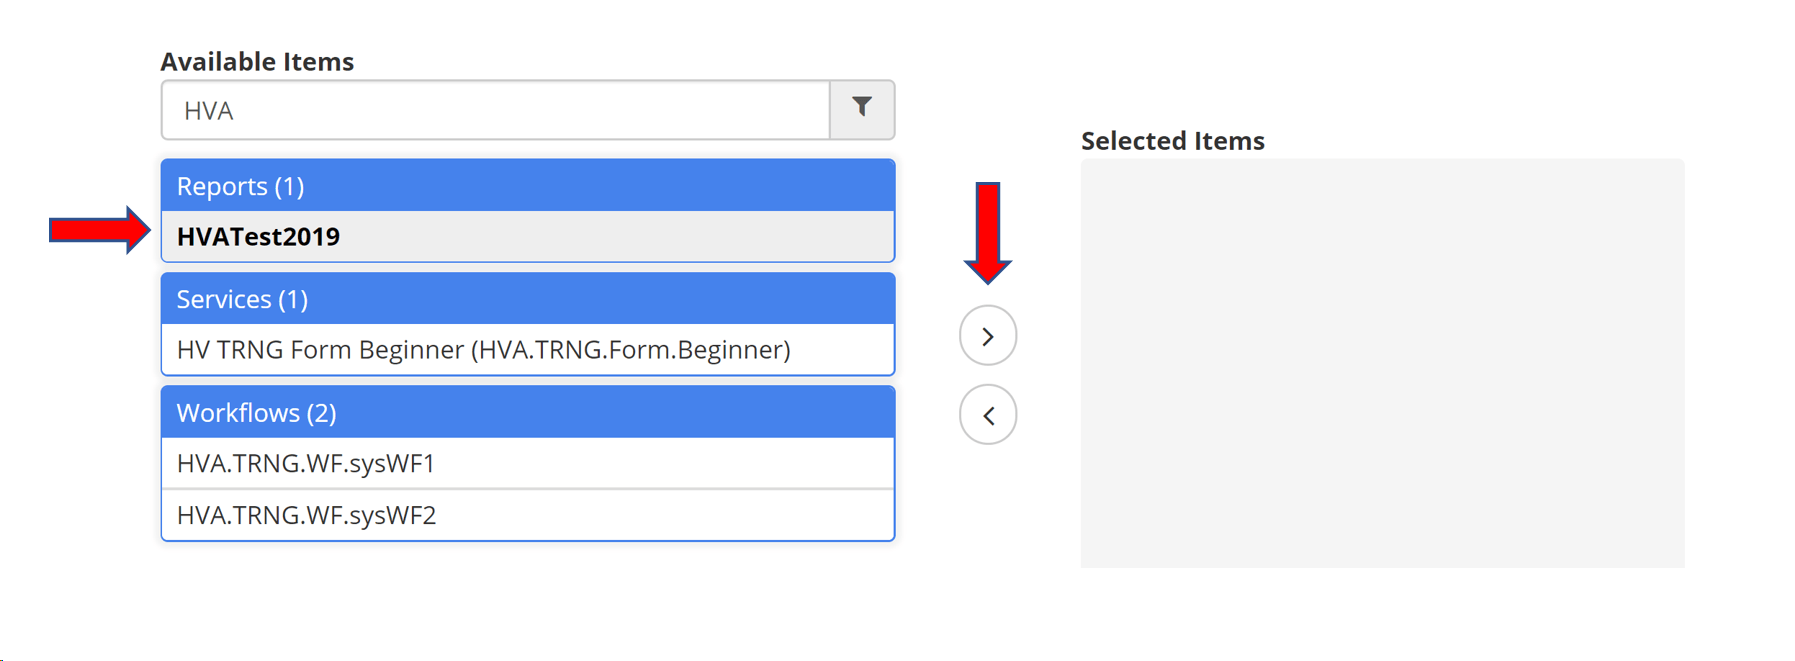
Note, you can use Control click to highlight multiple items at once.
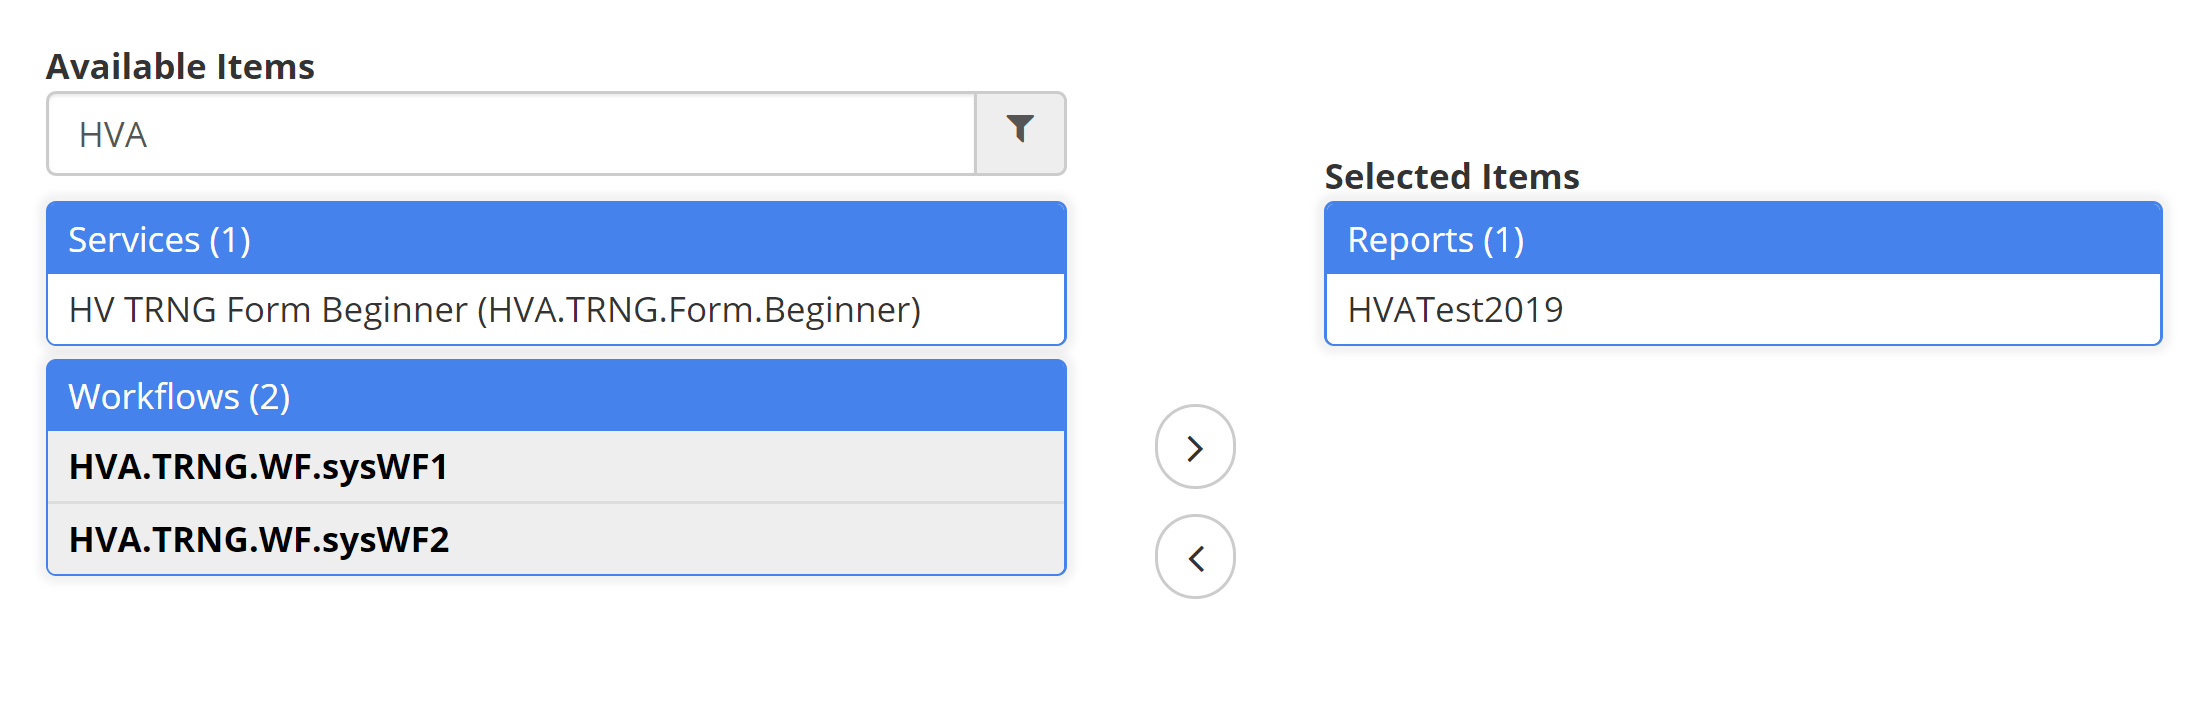
If you selected an item in error, just highlight the item you want to remove from the package from the selected items list. Then click on the button pointing to the left.
Once you have selected the items you want to include in the package, click the Save button. Note that you can go in and edit the package after you have saved it, so if you need to add or remove items to the package after the fact, you may easily do so.
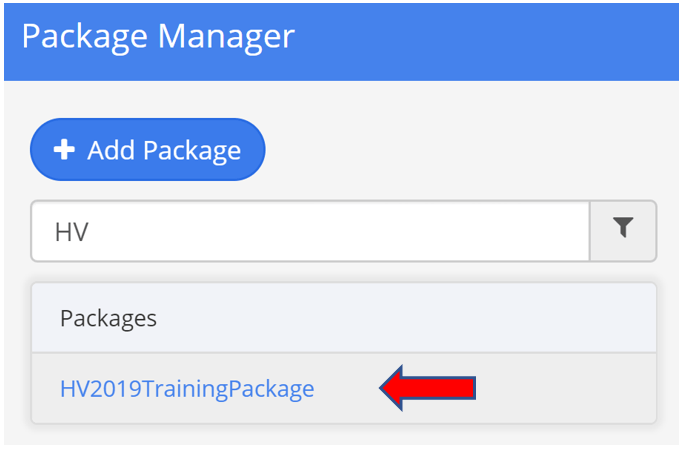
Once your package has been saved, you will be able to access it from the list of packages. Simply click on the package name link in order to access it.
Within each package, you will find different action buttons at the bottom of the screen. You may need to scroll down to see them.
The Edit button allows you to modify the package, and the Delete button removes the package completely from your list of packages.

The Create New Version button allows you to keep the existing version of the package you have, but then generates a new version which you may edit and save. You will have the ability to access previous versions of the package by clicking on the Version History button.
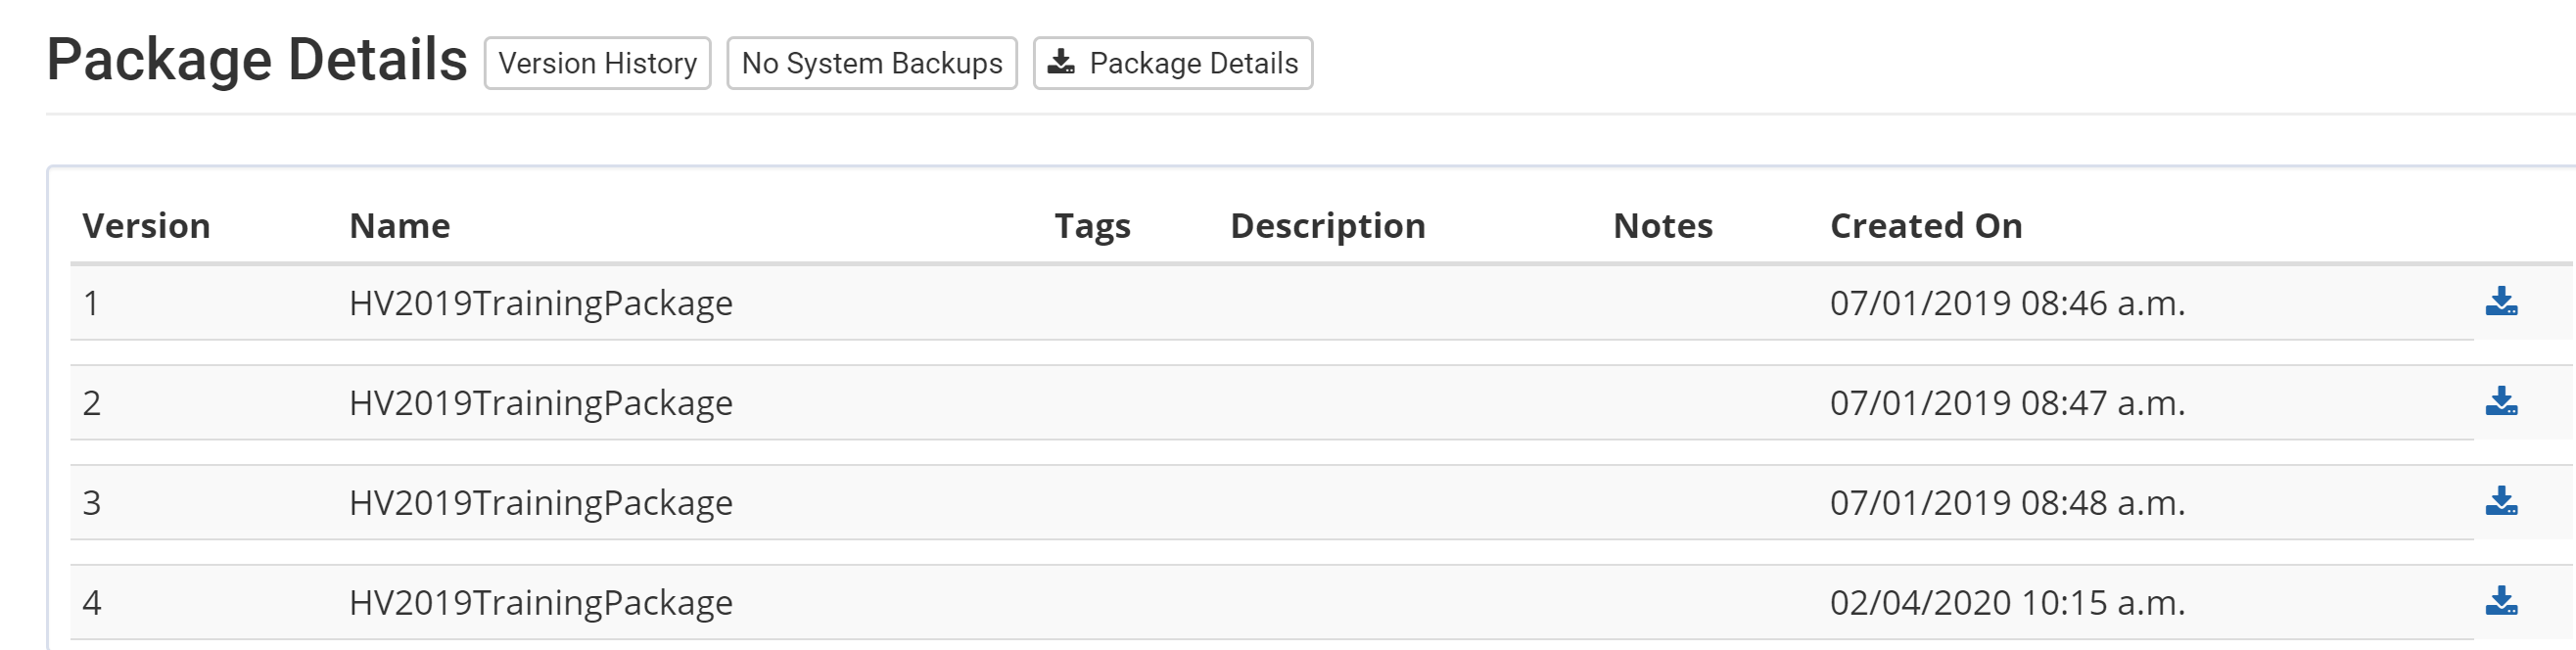
Note, that if you simply click the Edit button and save, without creating a new version, you will just be over-writing the existing package and will not be able to go back to a previous/earlier version of the package.
By clicking on the Export Package button, a zip file of all of the artifacts in the package will be generated. You will need to save the file to a place where you can then easily retrieve it in order to import it into the destination environment.

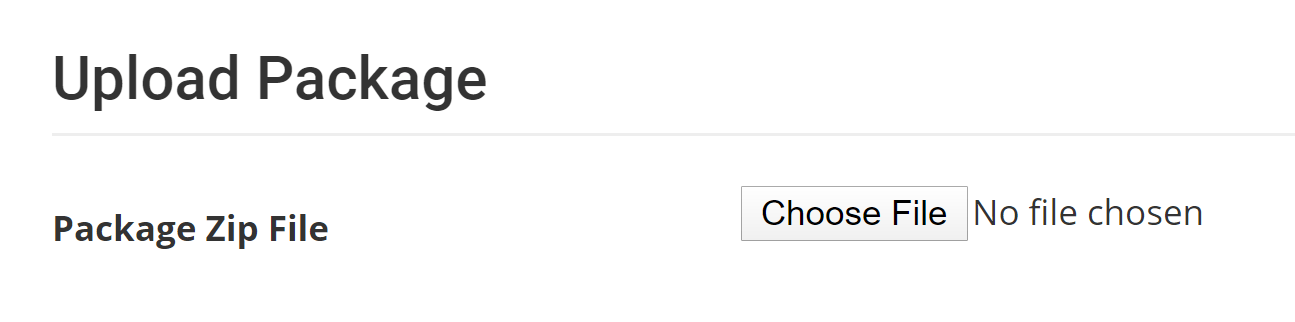
Now that you have generated and exported your package, you can log into the environment where you want to import the package. Open Package Manager, and then click on the Import Package button.
Next, select the file you want to load.
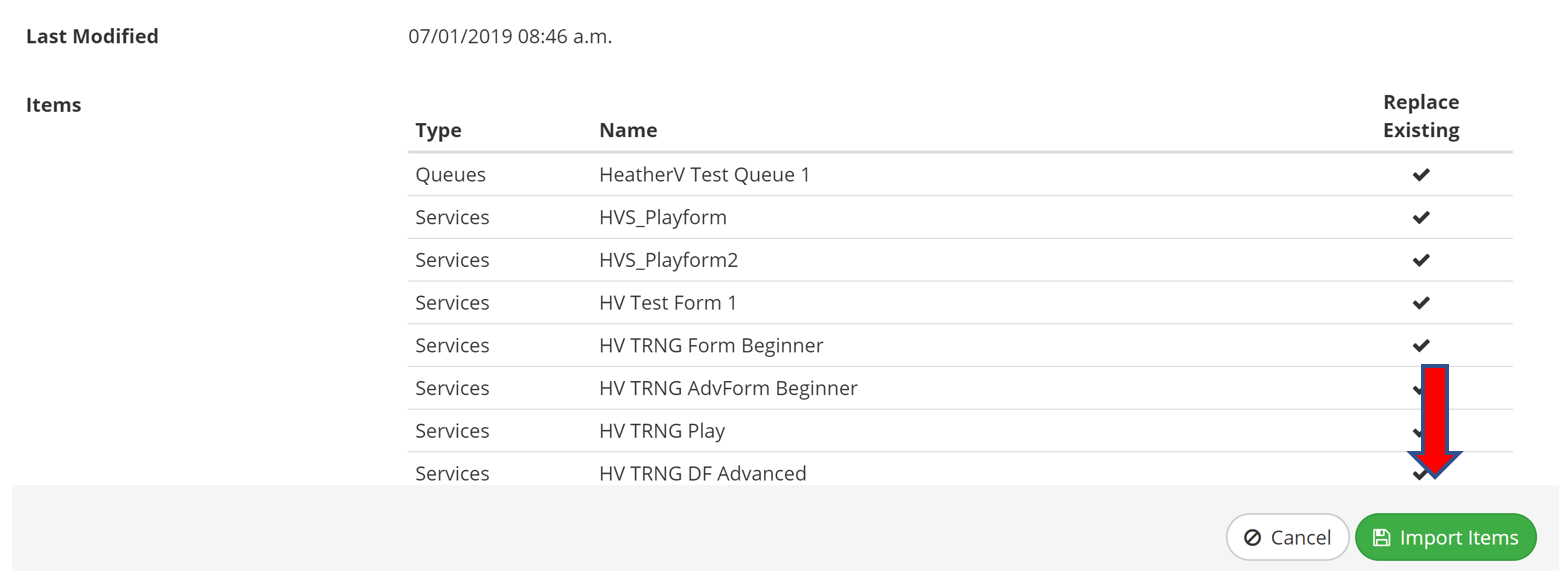
Once you have selected the file, a list of items in the file will appear. Note, if the elements in package already exist in the environment into which you are importing, you will see “Replace Existing” with a checkmark. Click on the Import Items button to import all of the artifacts.
You have now successfully migrated all the package items from one environment into another!
Remote Package Manager
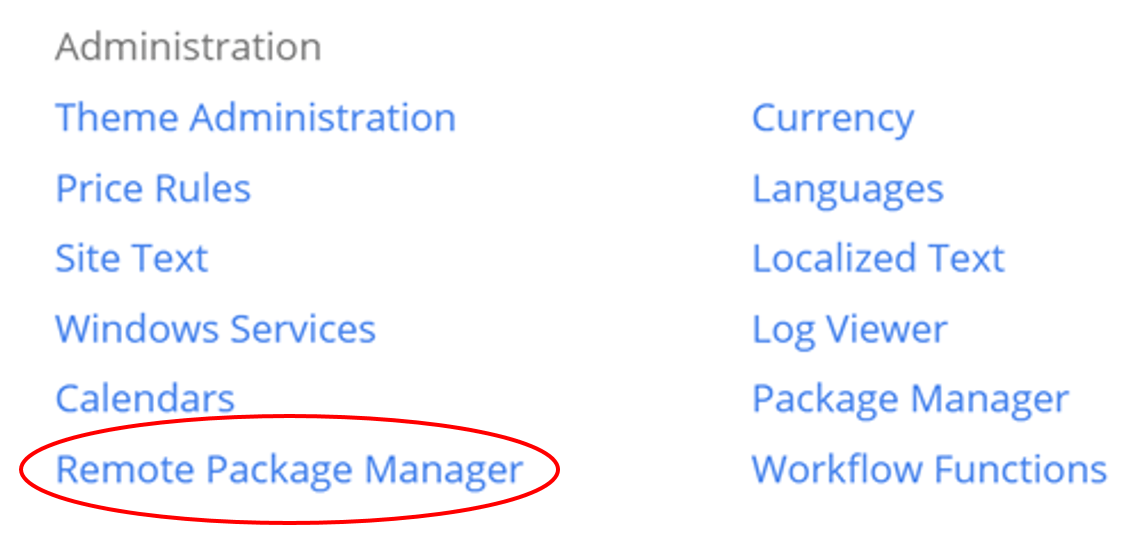
The migration process can simplified further by using the Remote Package Manager functionality found under Administration.
With the Remote Package Manager, you can link one PMG environment to another in order to allow the direct importing of packages across environments. This reduces the multiple steps needed to export a package from one environment, and then import it into another.
Using this feature, you can import packages in one step from the source environment. Here’s how:
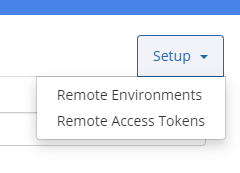
Once in Remote Package Manager, you will need to set up the environment and access token through Setup.

Once you have completed the setup, you can select the remote environment you want to import the package from, and then select the package to import.

By using the Remote Package Manager functionality, you don’t need to worry about downloading the zip file of artifacts and then manually selecting that file to be imported into the new environment. It can be a huge timesaver!
