Take data management to the next level
Create your own record collections

Everything in the news over the last year seems to be about setting records – and not the good kind. Record COVID cases. Record inflation. Record gas prices. Record sanctions. Where will the madness end?
Well, PMG can’t help much with the above, but we can tell you more about the new records we’ve been setting. Introducing PMG Records – a new-ish feature of the platform available in v21.3 and above.
If you’re utilizing custom datasets of any kind in your implementation (hint: that’s most of you), you may benefit from leveraging this enhancement for easier data management.
The Records feature provides a set of tools to help you create and manage the lifecycle of a set of data. This means the typical CRUD abilities (create, read, update, and delete), as well as other niceties – such as the ability to import/export data and support for migration between PMG environments.
The datasets stored in Records have their own administrative interface and, perhaps best of all for those of you who aren’t SQL pros, there’s no querying to worry about. The sets you create are easily accessible in all the places in the Platform where you used to need SQL – forms, app pages, reports, and workflows. Wait, what?!
OK, enough chatter – let’s look at a simple example of creating our first Record.
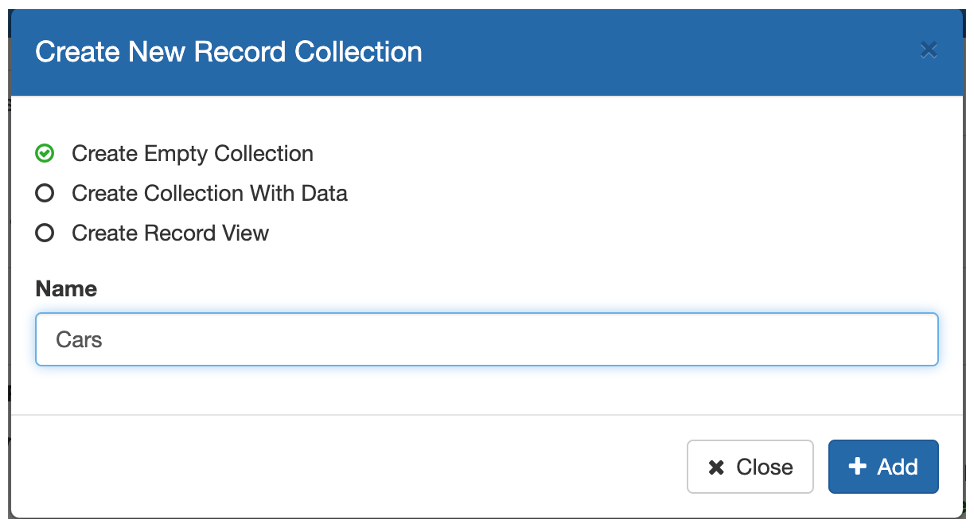
Records can be found via “Ctrl /” or by going to Administration > Records. In the upper left of the Records page, click Add to begin creating a new Collection. In this example, we’ll select the first option for simplicity.
Now we have an empty Collection called “Cars”. Our next step is to define what kind of information we want to store. The Design tab allows us to add to the Record structure. We just need to give a name and data type for each piece of info – all by using no-code configuration.
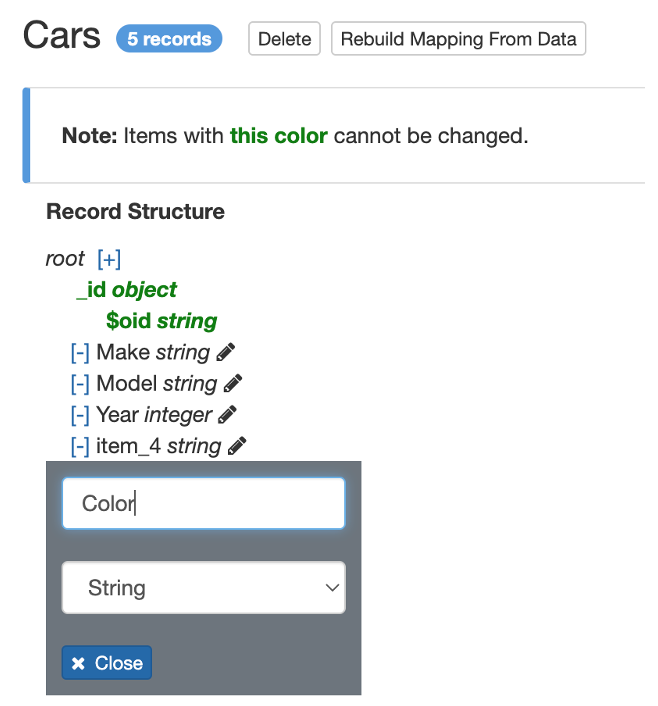
Note that all Collections will automatically have an identifier (_id) that can’t be altered. Other than that, the design is up to you.
So far, so good – we now have a Collection called Cars that will store the Make, Model, Year, and Color for each of our “car” data entries. And so obviously, our next step is to add some cars to our Collection. Figuratively, of course. ?
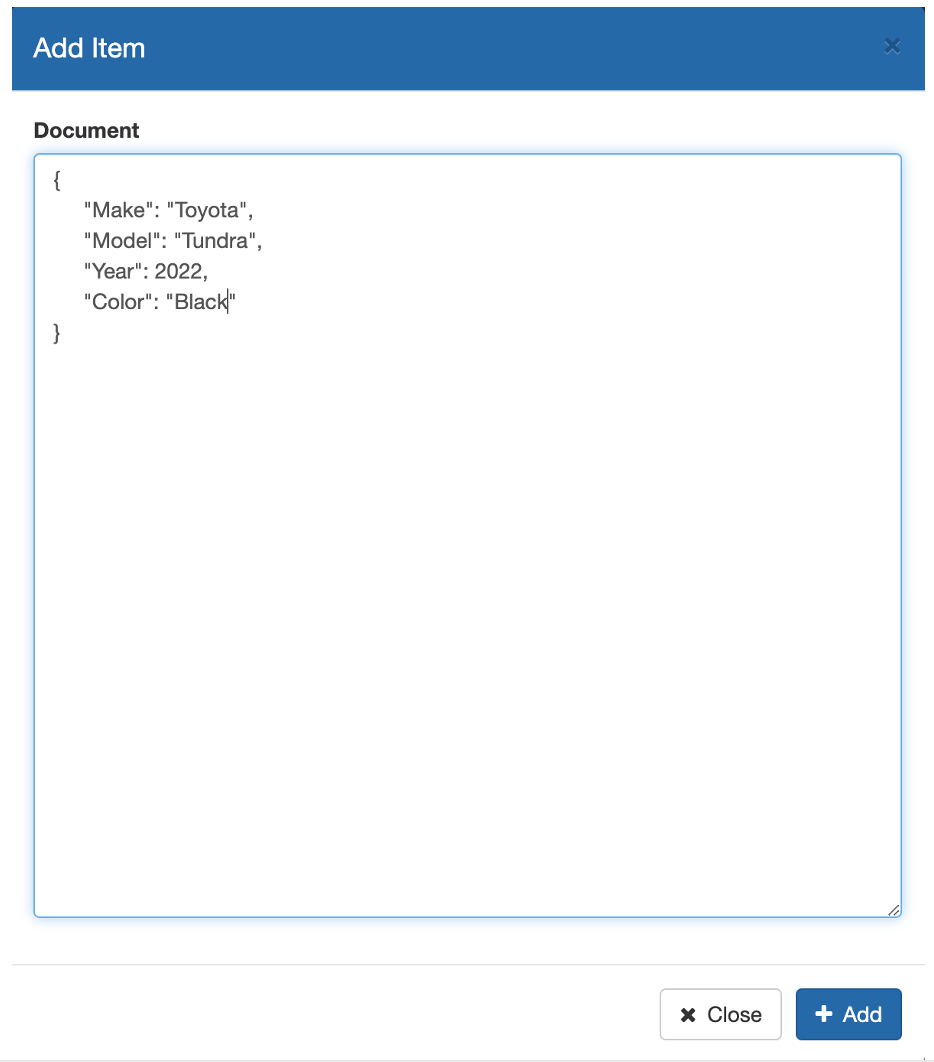
Next, we go over to the Data tab and click the Add Record button on the right. It’s a straightforward process to add as many records as we need.
And once we’ve added them, we can go over to the Table Preview tab to see the data.
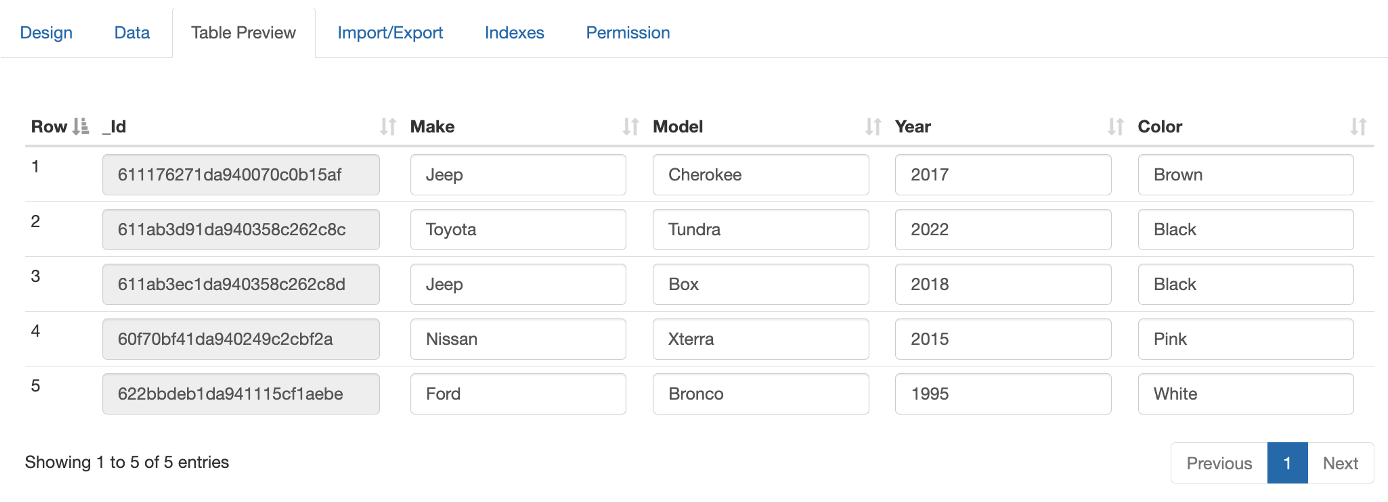
And bonus – the data is editable from this view!
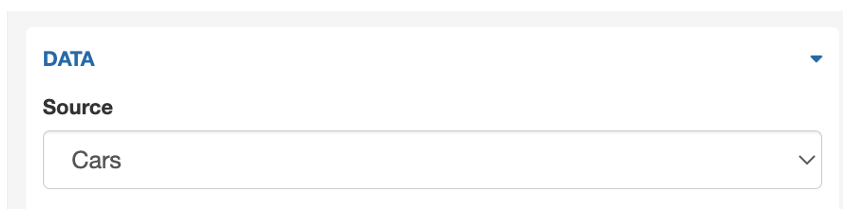
So now that we’ve made our first Record Collection of cars, we can use this dataset throughout the Platform. If we want to show it on a form or app page, we’ll now see Cars listed as a data source. The example below shows how to set it on a form Select List.
And don’t forget, you can use Query Builder (a/k/a Data Builder) to configure your filter criteria if needed, so still no query writing necessary. See previous newsletters for more info on that nifty feature:
Query Builder Part 1
Query Builder Part 2
Believe it or not, we still have more to tell you about Records. We’ll follow up with a Part 2 soon.
